
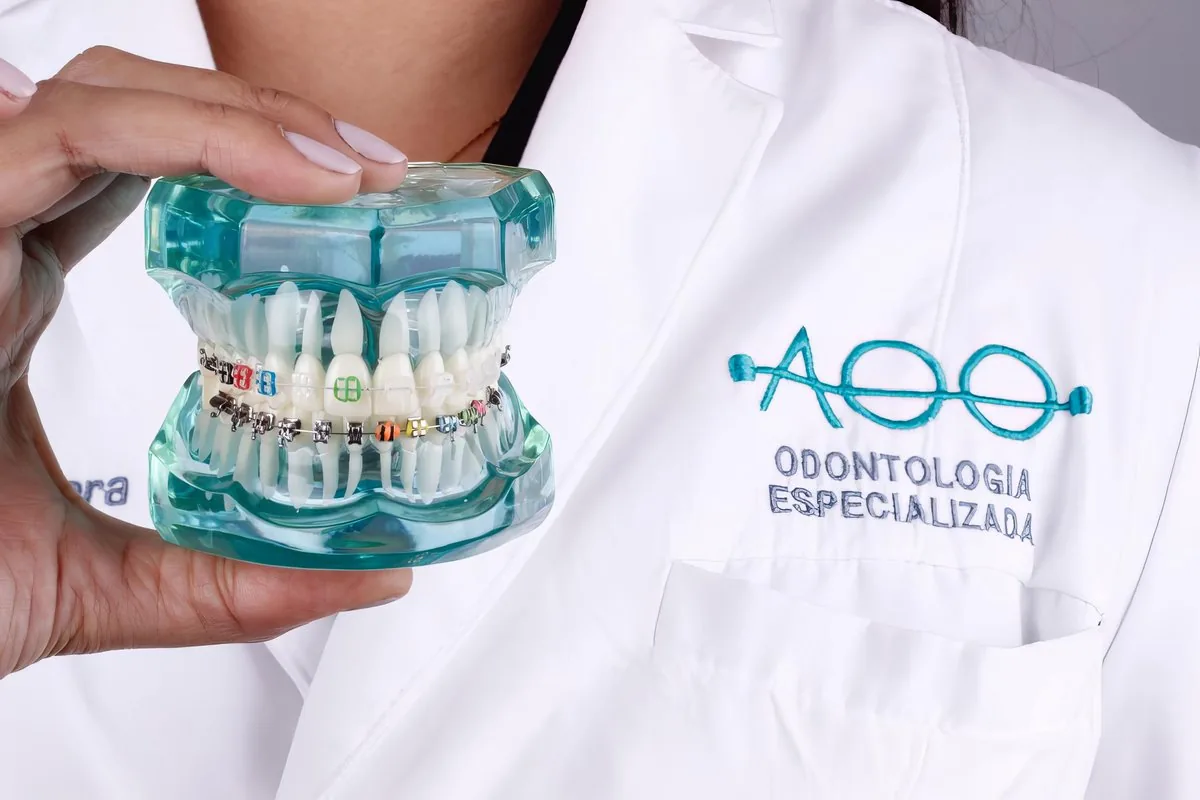
Starting orthodontic treatment—whether with modern Invisalign® clear aligners or passive self-ligating brackets—marks the beginning of an exciting transformation for your dental health and facial aesthetics. However, because orthodontic therapy involves biological bone remodeling and cellular changes within living periodontal tissues, the initial days and weeks involve a natural period of physical, muscular, and oral adaptation.
During this adjustment period, common questions inevitably arise: "Is it normal for my teeth to feel sore when biting down?", "What should I do if a bracket comes loose on a weekend?", "Why does the wire poke the back of my cheek?", "What happens if I lose my clear aligner while traveling?"
The vast majority of situations that feel alarming are routine mechanical issues that can be calmly and comfortably managed at home. As a specialist in Orthodontics and Maxillofacial Orthopedics, Dr. Adrianna Oseguera has created this definitive clinical care guide and home triage matrix to ensure complete comfort and peace of mind throughout your treatment journey.
1. The Physiology of Tooth Movement: Why Teeth Feel Sore
When an orthodontic wire is engaged or a new Invisalign tray is inserted, continuous light force is transmitted through the tooth root to the periodontal ligament (PDL)—a collagenous vascular cushion that anchors teeth to alveolar bone. This triggers a localized cellular inflammatory cascade:
- Compression Zone: Blood supply is temporarily reduced, signaling osteoclasts to dissolve microscopic bone cells.
- Tension Zone: Periodontal fibers stretch, signaling osteoblasts to deposit new crystalline bone.
This biological cascade releases chemical mediators (prostaglandins, substance P, and histamine) that stimulate nerve endings, creating a sensation of dull pressure or tactile tenderness when chewing. This tenderness is completely physiological and confirms tooth movement is underway. Discomfort typically peaks within 24 to 48 hours and fades by day 4 or 5.
2. Distinguishing Normal Discomfort vs. Real Emergencies
A. Normal Physiological Adaptation (No Clinic Visit Needed):
- Mild tooth tenderness when biting into foods during the first 3 to 4 days after an adjustment or new aligner tray.
- Minor cheek or lip dryness and slight irritation as oral mucosa toughens (keratinizes).
- Slight tooth mobility; teeth must loosen slightly in their sockets to migrate through remodeled bone.
B. Minor Mechanical Issues (Manage at Home, Schedule Next Visit):
- A loose bracket that remains secured along the archwire without sharp pain.
- A lost elastic hook or detachment of an auxiliary button.
- An archwire slipping slightly out of a molar tube without piercing cheeks.
C. True Orthodontic Emergencies (Contact Us for Priority Care):
- Direct facial trauma from falls or sports accidents resulting in tooth subluxation or jaw fractures.
- Severe, unmanageable swelling of the lips, gums, or facial spaces suggesting infection.
- A loose orthodontic appliance compromising swallowing or airway breathing.
3. Step-by-Step Action Protocols for Braces
Protocol 1: What to Do if an Archwire is Poking Your Cheek
As teeth align, the dental arch perimeter shortens, causing excess wire to slide out the back of the rear molar tube. If it rubs your cheek:
- Dry the Area Completely: Moisture prevents wax from adhering. Dry the sharp wire end using a clean cotton swab or paper towel.
- Roll Orthodontic Relief Wax: Pinch a pea-sized ball of medical wax, warm it between your fingers, and press it firmly over the poking wire end to form a smooth protective shield.
- Pencil Eraser Technique: If a thin flexible tie-wire is protruding, use the clean eraser end of a pencil to gently tuck the wire inward toward the tooth surface and away from soft cheek tissue.
- CRITICAL WARNING: Never attempt to cut orthodontic archwires with household nail clippers or pliers. Accidental clipping can fracture neighboring brackets, warp the wire, or cause the cut fragment to be aspirated into the airway.
Protocol 2: What to Do if a Bracket Comes Loose
- Bracket Still on Wire: If the bracket is sliding along the wire, gently slide it between two teeth and cover it with relief wax to stop it from spinning. Leave it in place until your appointment.
- Bracket Completely Detached: If the bracket falls completely off, place it inside a clean plastic bag or small container and bring it to your next appointment.
- Notify Our Office: Send a photo via WhatsApp so Dr. Adrianna can assess whether an immediate visit is required or if it can be rebonded at your next regular adjustment.
Protocol 3: Soothing Oral Sores and Cheek Ulcerations
- Warm Salt Water Rinses: Dissolve 1/2 teaspoon of salt in a glass of warm water and rinse gently for 30 seconds, 3 to 4 times daily. Saline promotes cellular healing and reduces bacterial load.
- Topical Hyaluronic Acid Gel: Apply 0.2% hyaluronic acid gel or benzocaine oral anesthetic gel directly to ulcers before meals to form a protective barrier.
4. Action Protocols for Invisalign® Clear Aligners
The Biological 22-Hour Wear Rule
Clear aligners only exert corrective force when seated fully against teeth. Removing aligners for extended periods causes bone hyalinization, leading to tracking lag. Always maintain 20 to 22 hours of continuous daily wear.
Safe Insertion & Removal Techniques
- Insertion: Seat the front teeth first, then press down evenly across both premolar and molar regions until the tray snaps firmly into place. Never bite down to force an aligner into position; biting can distort or crack the thermoplastic aligner.
- Removal: Use your fingernail or an aligner hook tool on the lingual (tongue side) of your rear molars, lifting upward. Once both sides disengage, gently roll the aligner forward over your front teeth.
Lost or Broken Aligner Decision Protocol:
- If Lost in Days 1 to 4 of Wear Cycle: Do not skip ahead to the next tray. Revert to your previous aligner to protect tooth positions, and message our clinic immediately for guidance.
- If Lost in Days 5 to 7+ of Wear Cycle: If teeth were tracking well, try advancing to your next sequential tray. If it seats comfortably without excessive force, wear it for 3 to 4 extra days to ensure complete biological expression.
5. 10-Item Clinical Orthodontic Triage Matrix
| Orthodontic Situation | Triage Level | Recommended Clinical Action |
|---|---|---|
| Poking archwire end | GREEN (Home Care) | Dry area and apply orthodontic relief wax. Message clinic for adjustment. |
| Tooth soreness 2 days post-adjustment | GREEN (Home Care) | Normal physiological adaptation. Soft diet; acetaminophen if needed. |
| Lost composite attachment (Invisalign) | YELLOW (Next Visit) | Continue wearing aligner. Replaced at next scheduled appointment. |
| Bracket loose on archwire (no pain) | YELLOW (Next Visit) | Secure with wax. Notify office via WhatsApp to schedule rebonding. |
| Cracked aligner (still holds shape) | YELLOW (Next Visit) | Wear with extra care when inserting/removing; notify orthodontist. |
| Completely broken archwire in two pieces | RED (Priority Visit) | Cover sharp ends with wax. Visit clinic within 24-48 hrs for wire change. |
| Loose palatal expander appliance | RED (Priority Visit) | Stop appliance turns immediately. Schedule same-day clinic recementation. |
| Direct dental trauma (tooth knocked/loose) | RED (Immediate Urgent) | Contact emergency clinic or hospital emergency room immediately. |
6. Orthodontic Survival Kit: What Every Patient Should Carry
Keep a small travel pouch in your bag or car containing:
- Two packets of medical orthodontic relief wax.
- A compact interdental proxy brush and floss threaders.
- A travel-sized soft toothbrush and fluoride toothpaste.
- A hard-shell aligner storage case (never wrap aligners in paper napkins).
- Acetaminophen (Tylenol) for transient soreness after wire activations.
- Lip balm with vitamin E to prevent dry, chapped lips.
- Chewies (for Invisalign patients) to eliminate micro-air gaps beneath trays.
7. Frequently Asked Questions (FAQ)
What pain relievers are best for orthodontic discomfort?
Acetaminophen (Tylenol) is the clinical first choice. Non-steroidal anti-inflammatory drugs (NSAIDs) such as ibuprofen or naproxen block prostaglandin synthesis, which can temporarily slow bone remodeling and tooth movement if taken excessively.
How do I clean my Invisalign aligners properly?
Clean trays morning and night using cool or lukewarm water, a soft toothbrush, and mild clear antibacterial liquid soap. Never use hot boiling water, which warps thermoplastic, or abrasive whitening toothpaste, which creates microscopic scratches that harbor odors.
Can I chew gum with braces or aligners?
With fixed braces, chewing gum is strictly prohibited as it bends delicate wires and debonds brackets. With Invisalign, gum sticks tenaciously to plastic trays; you must remove aligners before enjoying sugar-free xylitol gum.
What should I eat during the first few days after getting braces?
Stick to a soft diet requiring minimal biting pressure: creamy soups, fruit smoothies, scrambled eggs, yogurt, mashed potatoes, steamed fish, oatmeal, and pasta. Avoid raw carrots, crusty baguettes, and hard nuts.
What if I accidentally swallow a small piece of orthodontic wax?
Orthodontic relief wax is 100% non-toxic, food-grade paraffin or beeswax. If swallowed accidentally, it passes harmlessly through the digestive tract without medical concern.
Why does a tooth feel slightly loose during treatment?
Mild mobility is completely normal. For a tooth to migrate, surrounding bone must dissolve slightly before new bone solidifies around it. Once teeth reach their final position and retention begins, bone re-densifies and teeth become firmly anchored.
What if my aligners have rough edges irritating my tongue?
You can gently smooth the sharp plastic edge using a clean, fine-grit emery board or nail file with light strokes, followed by thorough washing. If irritation persists, contact our office.
How do I contact Dr. Adrianna if an urgent issue happens on the weekend?
Our clinic maintains active weekend patient support via WhatsApp at +52 (686) 140-9235. Send a clear, well-lit photo of your issue; our clinical team will review it and provide immediate triage advice.